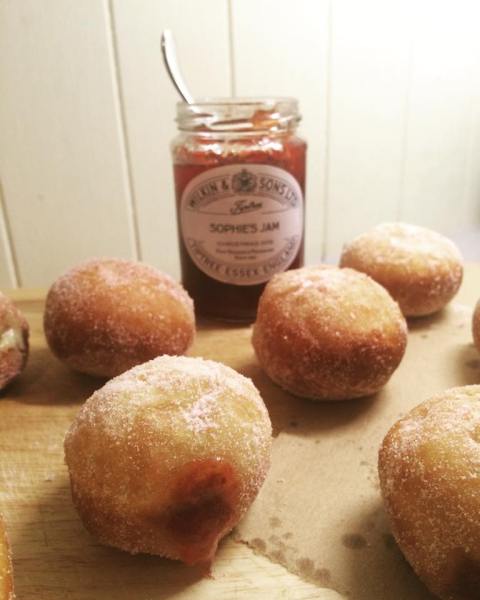
Pique Picnic Weddings

If you’re looking to have a laid back alfresco wedding, our bespoke wedding packages are the perfect solution. Guests can gather round on picnic blankets or tables, laden with hampers packed full of gourmet treats.

We cater for all dietary requirements and will work with you to ensure your big day is extra-special.

Don’t hesitate to get in touch today, we’ll happily send you a full list of our menu items and a sample hamper of any items you’d like to try.

Here’s an example of a menu chosen by one of our clients;

Sample menu


Wedding season will soon be upon us once again… bring on the stress of finding a different outfit and travelling across the country every other weekend. When has it not been worth it though? Celebrating love with good food, average to poor music and spectacular Dad, Mum and Great Aunt dancing is a recipe for a memorable occasion.

We, as chefs and having worked in the catering industry have witnessed many a beautiful wedding, in stunning marquees with formal three-course meals and a very similar format, so much so that it’s hard to remember which one was which! That’s why we’ve put together a wedding picnic package. Imagine the best quality picnic food packed in wicker hampers, sprawled out on trestle tables or blankets on a beautiful lawn. Informal formality at its best!

As gourmet picnic providers and having had our scotch eggs written about in Tatler, you can feel safe in the knowledge that everyone will be well-catered for.

See an example of a menu chosen by one of our clients here.

So if you’re thinking of having a picnic-themed wedding, you need look no further. We will work with you to create a bespoke package to make your big day as special and memorable as possible.

London Picnic delivery

Looking to order a picnic this summer? Say hello to your new picnic delivery service, Pique. http://www.piquefood.co.uk.

Pique delivers gourmet picnics across london. Pique delivers picnics to Henley, Lords, Ascot, Glyndebourne and much more.

Sophie, 25 and Laura, 26 met and became friends while working as chefs for a London catering company. With experience in many areas of the food industry, they decided to pull together their skills and start a company specialising in freshly made picnics.

From romantic picnics in the park; corporate events; school sports days; office treats and elevenses hampers for shoots, the Piquey Girls can create a picnic no matter the occasion or season. It really is the best London picnic delivery service.

The piquey girls met while working as chefs for a catering company and quickly realised our unparalleled love for having fun whilst cooking would set us on a pretty straight path to friendship.

Sadly after a couple of months Sophie decided to leave to do an internship at a swanky food mag for 6 months but ended up missing Laura too much so came back afterwards with her newfound media knowledge. Laura in the mean time was cooking away, perfecting our piquey recipes.

Wondering about our Piquey Boy? That’s Sam Simon, 27, a song-writer-come-chef who’s currently travelling the world on our behalf to pick up some inspiration. He’ll be back soon… we hope.

As trained chefs with a lot of catering under their belts, the Piquey Girls are a deft hand at cooking top-quality food for large numbers.

Whether you’re having a garden canapé party, children’s birthday party, milestone birthday etc (you can always find a reason to celebrate something), we can ensure you have food and service worthy of a celebration.

Whether you want a picnic theme or something more traditional, get in touch today to discuss your next event.

Want to pay us a visit? They’ll be at Hampstead food market every Saturday from 10am-3pm.
So if you’re looking to have a Pique picnic for any event this summer don’t hesitate to visit the Pique website today to arrange your picnic delivery. Pique is the best picnic delivery service in London.
Email info@piquefood.co.uk if you have any questions that need answering regarding your picnic order for Henley, Ascot, Lords etc. The picnics are full of the best treats; from runny-yolked scotch eggs to halloumi and courgette bites, it really is the best alfresco fare out there.

Chocolate and cinnamon hot cross buns

The change in seasons from brassica-laden winter to bountiful, fresh spring brings a sense of relief and hope that warmer and longer days are soon upon us. It’s the time of year when some get a little over excited and start donning flip flops and shorts at the first sign of a ray of sunshine.

As the daffodils pop their heads up through the soil to bask in the sun en mass, we know that Easter can only be around the corner. And with Easter comes hot cross buns. Fresh from the toaster and slathered in salty butter. ‘What could be better?’ I hear you cry… If you’re a hot cross bun purist then close this tab now, otherwise, carry on reading to see how to make these rather delectable chocolate and cinnamon moreish buns of joy.

Ingredients

  • 450g strong white flour
  • 3 tsp ground cinnamon
  • 1 tsp fine salt
  • 2 7g sachets (4 level tsp) easy bake yeast
  • 150g chocolate chips/ chocolate cut in to small chunks
  • 50g softened butter
  • 150ml luke-warm milk
  • 5tbsp luke-warm water
  • 1 egg, beaten

For the glaze

  • 2 tbsp caster sugar
  • 5 tbsp water

For the cross topping

  • 60g plain flour
  • 15g softened butter

Method

  1.  Get all of your ingredients ready and to the right temperatures before starting.
  2. Put the flour, cinnamon, yeast, salt in a large mixing bowl and mix well.
  3. Next, add the sugar and chocolate, stir together and make a well in the centre of the bowl.
  4. Add the butter, milk and water to the centre of the bowl and start to mix with a round-ended table knife. When it starts to come together, go in with your hands and lightly knead until you have a soft, even dough.
  5. Cover your mixing bowl with lightly greased cling film and leave somewhere warm until doubled in size for 1-2 hours. (Taking a picture on your phone before leaving is good for a size reference point.)
  6. When doubled in size, turn the dough out and gently knock back to remove any larger air bubbles.
  7. Divide the dough in to 12 equal portions and roll in to a smooth, round ball.
  8. Place your balls of dough on a lined baking sheet and leave in a warm place for 45 minutes to allow them to rise to their final shape.
  9. Meanwhile, make the pastry for your crosses. Do this by rubbing the butter in to the flour until a smooth dough is formed. Roll out and cut 12 strips (there should be a lot extra). You can now preheat your oven to 220ºC for the buns.
  10. When the 45 minutes are up, lightly brush the pastry strips with water and place on top of the buns. Now pop the tray in to the oven and bake for 15 minutes.
  11. While they’re cooking, make the glaze by dissolving the sugar in the water on a medium heat until dissolved.
  12. Remove the buns from the oven and brush with the glaze while still hot. Then, place on a wire rack and allow to cool before tucking in.

There’s a few steps here but it’s really quite simple and very rewarding. Now it’s time to put the kettle on for an afternoon snack- just don’t forget to save some for breakfast.

Spicy sausage pasta made with lefotvers

When it’s this bitterly cold outside and the thought of exposing your hands to the elements by carrying food shopping bags is enough to make you shudder, it’s time to turn to your trusty store cupboard ingredients. But what happens when the landscape inside your fridge is as sparse and bleak as the one outside your front door? Sure, you could put some gloves on and brave it, OR, you could make this simple pasta that uses minimal ingredients.

Spicy sausage pasta

Ingredients

  • 4 sausages
  • 1 brown onion or a couple of shallots, finely diced
  • 1 tin of tomatoes or jar of passata
  • 2 cloves of garlic, finely chopped
  • Any leftover tomatoes you have in the fridge, chopped
  • 1 chilli, deseeded and finely chopped (or a pinch of chilli flakes)
  • Olive oil
  • Splash of balsamic vinegar (or red wine vinegar, or a squeeze of balsamic glaze)
  • Any fresh herbs you have leftover, eg. thyme sprigs, basil…
  • Pasta of your choice
  • Parmesan (or whichever morsels of cheese that have survived the week)

Method

  1. Put the sausages in a pan of water and bring to a simmer. Cook for around 7 minutes, drain and allow to cool.
  2. Heat a generous glug of olive oil in a pan. Add the diced onions and stir on a medium heat for 5 minutes. Add the chopped garlic, chilli and thyme if you’re using it and cook for another couple of minutes.
  3. Add the fresh chopped tomatoes. Cook down until it’s paste-like but be careful not to let it catch on the bottom.
  4. Add the tinned tomatoes or passata and bring to a simmer. Meanwhile, get a pan of water on and ready for your pasta.
  5. When the sausages are cool enough to touch, carefully remove the skins and discard. Chop the sausage meat in to small chunks. Add these to the simmering tomato sauce.
  6. Add the splash of vinegar, taste and season accordingly with plenty of black pepper- allow to simmer.
  7. Add your pasta to the water pan and cook until al dente. Drain and add to the tomato sauce pan on a low heat, stir through until the pasta is coated with sauce. Serve with fresh basil and parmesan.

Baked homemade gnocchi with prosciutto, cavolo nero and mascarpone

I was 11 when I first went to Italy. Some family friends had invited me to go for the last 3 weeks of the summer holidays. At first, I was physically ill with the thought of leaving Mum and my family for that long. For the whole journey from Bath to London, as the other two kids sang along to Miss Dynamite, I sat in the middle with a feeling of dread and longing to be back with Mum.

Flying in to Rome, we drove up to Cortona in Tuscany and homesickness quickly switched to excitement and intrigue as we drove through the dusty, heat haze, up the poplar-lined track and towards the shuttered farm house that sat alone, surrounded by pine-laden hills. The aroma of pine and the sound of crickets still takes me right back to that holiday.

The next few weeks were filled by exploring the gardens and surrounding hills. We spent the days chasing and catching lizards, building rope swings and attempting to build a make-shift pool out of what I think was an old skip. We soon discovered that masking tape wasn’t going to hold the holes together and moved on to trying to find wild boar- thank goodness we didn’t succeed.

Italy was where I discovered tomatoes. Not the kind you get in England but big, sun-ripened bursting ones with deep red skins. Helping to prep them in the stone-floored, cool kitchen, you couldn’t ignore the aromas coming from them- they were like nothing I’d ever experienced. We’d eat them in the shade with buffalo mozzarella, hams, salamis, rocket and fresh bread- what more could you possibly want.

It’s also where I discovered gnocchi, in a small restaurant in Cortona. Bored of ordering spaghetti bolognese and margarita pizza (I was 11, don’t judge me), I was given a verbal slap on the hand and told to order something different. I loved it.

This recipe is a tribute to that holiday. I’ve used Unearthed prosciutto del Poggio as I feel their open mind to discovering new foods is on a par with how my 11 year old self felt during those three weeks of exploration and discovery. I’ve paired it with cavolo nero, a shallot, tomato, garlic and thyme sauce, mascarpone and homemade gnocchi.

gnocchi

Ingredients

  • 2 packs Unearthed Prosciotto– from Waitrose (I used 12 rashers and ate the rest)
  • 200g cavolo nero (use kale if you can’t find)
  • 12 tsp mascarpone
  • Parmesan to serve (optional)

For the gnocchi

  • 1kg floury potatoes
  • 175g ’00’ four (use plain if you can’t get)
  • 2 large egg yolks
  • generous pinch of salt

For the sauce

  • 2 large echalion (banana) shallots, finely sliced
  • 4 fresh plum tomatoes, diced
  • 2 large garlic cloves, chopped
  • 680g jar of passata (I used Cirio)
  • 3 sprigs of thyme
  • Splash of balsamic vinegar
  • 1 tsp tomato puree
  • Generous glug of olive oil

Method

  1. Preheat the oven to 160ºC. Rub the potatoes in olive oil and place on a parchment lined baking tray. Bake for 1.5 hours, or until soft- this will depend on their size. Turn them half way through to cook evenly. (If you’re impatient, put them in the microwave 2 or 3 at a time and cook in bursts until soft all the way through).
  2. While your potatoes are in the oven, make your sauce. Heat the oil to a medium heat and add the shallots and garlic. Fry, stirring for 5 minutes until soft.
  3. Add the chopped tomatoes and leaves from the thyme sprigs and cook until the tomatoes have broke down. Keep stirring to make sure they don’t catch and add a splash of water if it gets too dry.
  4. When it’s looking paste-like, add the balsamic vinegar and tomato puree, stir to incorporate then add the passata. Leave on a low simmer, stirring occasionally until needed late. Slow cooking tomatoes really brings out their flavours.
  5. When the potatoes are soft, leave to cool for a few minutes and then carefully remove the skins. If you’ve got sensitive hands and want to get on with things then don some clean washing up gloves- these will protect your hands from the heat.
  6. Put the potatoes 1 by one through a potato ricer or pass through a sieve in to a large mixing bowl. Add the egg yolks, sieved flour and salt. Bring together with a round-ended knife and then your hands to form a dough.
  7. Tip out on to a lightly floured surface and knead lightly. Roll in to a thick sausage shape and cut in to 4 pieces. Roll the first piece out in to a thinner sausage (about 1.5cm thick) and cut in to 2cm pieces. Pinch gently in the middle and place on a parchment-lined tray.gnocchi-3
  8. Turn on the grill to high and boil two pans of water- one for the gnocchi and one for the cavolo nero. Put the cavolo nero in the pan for no more than a minute, then drain, cool under cold water and set aside.
  9. Cook the gnocchi in two or three batches. It’s cooked when it floats to the surface. remove with a slotted spoon and add to the sauce. When it’s all cooked, stir the kale in to the gnocchi and sauce and tip in to a large baking dish. tear the ham in to roughly two pieces and push in to the gnocchi, keeping the top exposed. Dot with teaspoons of mascarpone.
  10. Place the dish under the grill, keeping a watchful eye. You want the ham to crisp up a little on top and for the mascarpone to brown slightly. When this is done, you’re good to go, serve with a salad and a good Italian red-divine.

Going on this trip proved that you often get the most out of doing things that you’re scared of and taught me a valuable lesson in using fear to keep exploring and keep discovering.


Proper Bavarian frankfurters with beer onions, pickled red cabbage and a roasted garlic and mustard mayo

Think of Bavaria and one of two images will probably pop in to your head (unless you’ve travelled there and are less ignorant than me). One is lederhosen-wearing men, dancing in hilly pastures with slopping, frothy steins of beer. The other is of a sausage-mad nation, dressed much the same as above, sitting on long benches, acting raucously.

I must admit that frankfurters are my biggest guilty pleasure and I find it hard to say no to the smoky, slender things, all wrapped up snugly in a bun, covered in onions and cheap mustard.

I know that many people’s noses visibly turn up at the mere sound of a Frankfurter which is pretty understandable; from the ones that come in tins to the ones you see rolling about at the cinema- it’s hard to ignore the fact that it’s not exactly quality cuts of meat that have been squished into rather odd looking sausages. This can be said of most fast foods though, so if you can get a gourmet burger then why not a gourmet frankfurter?

Welcome Unearthed Bavarian beechwood smoked frankfurters. No mechanically processed chicken in sight, these are 82% pork, proper frankfurters. Unearthed say that they’re reclaiming the frankfurter and they really have.

Unearthed give you everything you want from a frankfurter with the bonus of coming from a company that’s so passionate about sharing the authentic recipes and produce they’ve discovered from around Europe. You feel like you’re getting a good, authentic product  from just looking at the packaging and you most definitely are.

frankI was at home for a big family lunch so thought I’d try them out. I served them in baguettes with Duvel beer-caramelised onions, pickled red cabbage and mustard and roasted garlic mayo. Needless to say, there are now a few more frankfurter converts.

Serves 4

Ingredients

  • 2 fresh baguettes
  • 2 packs Unearthed Bavarian frankfurters (from Waitrose)
  • 1 bag of watercress

For the Duvel beer onions:

  • 3 brown onions, sliced
  • Glug of olive oil
  • 2 bottles of Duvel
  • Knob of butter
  • Splash of red wine vinegar

For the Mayonnaise

  • 2 free-range egg yolks
  • 300ml light olive oil/ pomace oil
  • 4 garlic cloves, roasted whole with skin on
  • 3tsp english mustard
  • Squeeze of lemon juice

For the quick pickled red cabbage

  • ½ red cabbage, very finely sliced
  • 500ml cider vinegar
  • 200 ml red wine vinegar
  • splash of apple juice
  • 150g caster sugar
  • 1 tsp yellow mustard seeds
  • salt

Method

  1. Heat oven to 160ºC and roast the garlic cloves for the mayo for half an hour or until soft and paste-like.
  2. In the meantime get on with the onions. Heat the oil in a large pan and add the onions on a medium heat. Cook stirring occasionally until soft and a caramelised brown colour. This will take around half an hour.
  3. For the cabbage, add all of the ingredients apart from the cabbage to a saucepan and heat until simmering, simmer for 10 mins and then strain through a sieve on to the sliced cabbage.
  4. For the mayonnaise, put the yolks, 1 tsp of the mustard and seasoning in a mixing bowl and whisk together.
  5. Gradually add the oil in a slow stream, whisking constantly. When 2/3 of the oil is incorporated, add the rest of the mustard and lemon juice. When the garlic is ready, squeeze out of the cloves in to the mayonnaise and whisk in. Whisk in the rest of the oil in a steady stream, taste, adjust and set aside.frank-2
  6. Your onions should now be soft and brown. Add the 2 bottles of beer and allow to simmer rapidly until reduced and sticky. When this has happened, add the knob of butter and red wine vinegar. Simmer again for 5 minutes and then set aside.
  7. Cook the frankfurters- I chose to boil them but you can grill them or pan fry quickly in butter.
  8. While they cook, strain the red cabbage.
  9. Chop the ends off the baguettes and divide into quarters. Cut open down the middle. Spread in the mayo, pack in the watercress and pickled cabbage, slide in the frankfurter and cover with beer onions.
  10. Serve with extra of everything and steins (or bottles…) of beer all round!


Go nuts for doughnuts (and white chocolate and hazelnut hot choccy)

When you’re at any sort of funfair or festival as a child, teen or adult, it’s impossible to walk past a doughnut stand without subconsciously (or, actually, very consciously) meandering, nose first, towards it.

Yes, yes, I want my face and hands covered in sugar, now.

There’s something so indulgent about getting a paper bag full of sugar dusted dough that’s still warm and smells like heaven. I said before I thought freshly baked bread was arguably the best smell in the world… Well, meet it’s heavy weight contender; freshly cooked doughnuts.

It’s such a shame that they’re almost certainly waving a few nutritional value red flags but that didn’t stop me eating 4 of them. If you’re going to treat yourself, do it properly. It won’t hurt to ignore the food police once in a while.

You can get creative with the filling, I attempted to make a white chocolate hazelnut spread to fill them with but sadly I made it too thin (I then adapted it and it made the most incredible hot chocolate, see recipe below). What better than a traditional jammy doughnut anyway? Maybe a salted caramel one but that’s open to discussion.

Ingredients

  • 220g strong white flour
  • 50g butter, cold and diced
  • 100ml luke warm milk
  • 1 medium egg, beaten
  • 7g sachet dried yeast
  • 1 tbsp caster sugar plus extra for dusting
  • pinch of salt
  • 3tbsp jam
  • 1.5l sunflower or vegetable oil

For the salted caramel filling

  • 125g light soft brown sugar
  • 80ml double cream
  • 70g softened butter
  • Pinch of sea salt

You will also need…

  • Piping bags (see how to make them here)

Method

  1. Sift the flour in to a mixing bowl and add the salt and rub in the butter until the mix resembles breadcrumbs.
  2. Add the caster sugar and yeast- mix and make a well in the centre.
  3. Mix the beaten egg in to the warm milk and pour in to the well. Using a rounded knife, bring the dough together-it should be soft and almost sticky. Tip on to a lightly floured surface and knead for 10 minutes until smooth and elastic. If the dough is too wet and sticking to the surface, add small amounts of flour and knead in.
  4. Put the dough in a lightly oiled bowl, cover with cling film and leave to prove in a warm place for an hour or until doubled in size.
  5. For the salted caramel cream, heat the sugar and cream together and allow to boil for a couple of minutes-put aside to cool.
  6.  When the dough has risen, tip out and divide in to 12 equal pieces. Use scales if you want to be precise.
  7. Roll the portions of dough in to balls by pinching together the bottom and rolling on the surface. Place pinch side down on a lined baking sheet and place somewhere warn for 45 minutes.FullSizeRender (1)
  8. While you wait, prepare your fillings. Beat the softened butter for the salted caramel until soft and fluffy. Gradually add the caramel, beating as you go. If you’re making your own piping bags do so now.
  9. Just before the 45 minutes are up, heat the oil in a saucepan until a cube of bread turns brown in 30 seconds (190’C)
  10. Fry the doughnuts in batches of 3, lower them in with a slotted spoon and fry for 30 seconds each side. Remove and place on kitchen roll.
  11. Allow to cool slightly, then, using a sharp knife make a slit in the side and pipe in the jam. For the salted caramel ones, allow the doughnuts to properly cool before piping in the filling.
  12. Dust in caster sugar and eat. Eat now.

Screen Shot 2016-01-28 at 00.42.42

How to make white chocolate and hazelnut hot chocolate

  1. Toast 100-150g hazelnuts at 200’C for 5 minutes or until they start to slightly colour and release their oils.
  2. Gently heat 400ml milk in a pan. While it’s heating, roughly chop the hazelnuts. Add to the simmering milk, turn off the heat and leave to infuse for half an hour.
  3. Strain the milk in to a new pan and add 150g white chocolate, broken in to pieces. Heat very gently, stirring continuosly.
  4. Pour in to 2 mugs and savour each sip.


Rarebit with caramelised onions and homemade sea salt and thyme bread

Comfort food at its absolute best. January is already miserable enough without giving up a bunch of your favourite foods- so I say eat what makes you happy. There’s still months before its going to be warm enough to have any flesh on show, so why not just indulge a little longer…

You can make most of this recipe with ingredients from the store cupboard and fridge. Making your own bread is time consuming but actually very simple and it will fill your home with arguably the best aroma in the world. You could make it a few hours in advance, or the day before as it’s going to be toasted. If you can’t be bothered, then any nice loaf will do.

If you’re not making the bread, jump to step five then follow step 11 onwards.

Ingredients:

For the bread

  • 450g strong white flour
  • 7g sachet yeast
  • 290mls luke-warm milk (not hotter than blood temp as will destroy the yeast!)
  • Bunch of fresh thyme, leaves removed
  • 2 tsp sea salt
  • 1/2 tsp caster sugar
  • 2 medium eggs- 1 beaten for the bread mix and one for glazing.

For the caramelised onions

  • Knob of butter
  • 2 red onions, finely diced
  • 100ml balsamic vinegar
  • 1tbsp caster sugar
  • Pinch of salt

For the rarebit topping

  • 150g mature cheddar cheese, grated
  • 120ml milk
  • 25g plain flour
  • 1 tsp Worcestershire sauce
  • 1 tsp English mustard
  • 2 egg yolks
  • Seasoning to taste

Method

  1. Get all of your ingredients for the bread measured out and ready to go- it’ll make your life easier when you begin.
  2. Using a little of the warm milk, dissolve the sugar and yeast in a bowl; if it clumps together, gradually add more milk until smooth.
  3. Put the flour, thyme and salt in a large mixing bowl. Add the yeast mixture, the rest of the milk and the beaten egg. Using a round dinner knife, cut through the mixture, mixing it until it all starts to come together.
  4. Tip the mixture out on to a lightly floured surface and knead for 10 minutes or until smooth and elastic. Put the dough in a lightly oiled bowl, covered with lightly oiled cling film, in a warm place for 1 hour or doubled in size.
  5. Meanwhile, soften your diced onions in the butter until completely soft. Add the balsamic vinegar and sugar and reduce until sticky but with a little liquid around the onions. Set aside.
  6. When the dough has risen, tip out on to a lightly floured surface and knock-back (knead lightly for a minute to even out the air bubbles).
  7. Heat your oven to 200’C/180’C fan. Put a tray of water on the bottom of the oven- the steam generated will help your bread for a nice crust.
  8. Form the dough in to the shape you’d like- trying to maintain an even-ish height throughout. Place on a lightly floured baking tray and press gently to flatten the base. Using a sharp knife score in to the top- make whatever pattern you fancy.
  9. Cover the same way as previously and  entertain yourself for half an hour while it rises to 1 1/3 the size, then, glaze lightly with beaten egg.
  10. When ready, bake in the oven for 30 minutes or until a light golden brown. It should sound hollow if you knock on the base of the bread.145305494517638
  11. Now for the rarebit topping, it’s getting exciting now. Heat the milk gently with the cheese in a small saucepan. When smooth, tip in the flour, mustard and Worcestershire sauce and beat with a whisk, on the heat until the mixture starts to come away from the sides.
  12. Add the two egg yolks and beat until smooth. It should be a thick paste but spoonable.
  13. Turn your oven to the grill setting and turn up to 220’C.
  14. When the bread is cooked and cooled down, slice four 1.5cm slices. Toast either in a toaster or drizzled lightly with olive oil and in a griddle pan.
  15. Smother a thin layer of the onions on to the toasted bread, and then cover with a thick layer of cheese sauce. Place your toasts on a baking tray (the one used for your bread will do and save on washing). Place under the grill and keep an eye as they will turn quickly. When dark brown patches begin to appear they’re good to go.
  16. Serve with a salad or eat as they are for brunch, lunch or dinner.


Having a quail of a time

Since being invented by Fortnum & Mason in the 1700s, the Scotch egg has been through the mill and is sadly often spat out in the most unappealing of manners…  Recently, however, the Scotch egg has made a revamped come-back to the bars of gastro pubs and artisan food shops alike. The words ‘Scotch egg’ no longer evoke images of those grim, rubber ball-like picnic snacks but rather crisp bread crumbs, flavoursome sausage meat and orange, runny yolks.

Here I’m going to share with you my recipe for festive Scotch quail’s eggs. You can serve them as a show-stopping canapé at a party or just eat as a moreish snack.

You will need…

  • 12 quail eggs
  • 500g sausage meat (or skinned cumberland sausages)
  • 8 sage leaves, finely chopped
  • 1/2 an onion, finely chopped
  • 1 tspn English mustard
  • 100g breadcrumbs
  • 1 egg, beaten
  • 1 tspn runny honey
  • Salt and pepper

Method…

  1. Gently fry the onions in olive oil or butter until softened, do not brown. Allow to cool.
  2. Bring a saucepan of water to the boil, add the quails eggs and cook for exactly 2 minutes. Remove the eggs and plunge in to cold water, peel gently.
  3. Mix the sausage meat, sage, mustard, honey, seasoning and cooled onions by hand or with a fork until well combined.
  4. Divide the mixture in to 12 and flatten each portion, gently wrap around the egg, trying to maintain an even thickness throughout.
  5. Dip each sausage-coated egg in to the beaten egg, followed by the breadcrumbs and set aside.
  6. Carefully heat 5cm of vegetable oil in a saucepan until a a bit of bread sizzles and turns brown in 30 seconds.
  7. When your oil is ready, fry the Scotch eggs in batches for 2 minutes or until a deep golden colour forms on the coat.
  8. Serve whole or gently cut in half as shown in the picture.


Festive spiced chutney

Christmas wouldn’t be Christmas without the many distinctive aromas that lie heavily in the air for the month of December. Your sense of smell can bring back the strongest memories, transporting you somewhere momentarily that you had previously forgotten.

For me, cloves, ginger, cinnamon and star anise signify the start of the festive season. Food becomes more aromatic, telling of a time when spices from the Middle East were an exotic treat. It’s amazing how much flavor these spices give off; a few cloves in a bouquet garni popped in a stew or chutney can lift your food to another level.

I wanted to encompass all the flavours of Christmas in to an edible gift and what better than a spiced tomato chutney to do the job. Tie your jars with a pretty ribbon and a gift label and you’ve got easy presents for friends, colleagues and relatives. Chutney starts to taste best after a month of maturing so get making it now and it’ll be perfect for Christmas!

Makes about 1.4kg

Ingredients

  • 1kg tomatoes, chopped
  • 3 medium white onions, finely diced
  • 3 garlic cloves, crushed
  • 400ml white wine vinegar
  • 2 red chillies, deseeded and finely chopped
  • 1 red pepper, chopped
  • 2cm piece of ginger, finely chopped or grated
  • Zest of half an orange
  • 250g caster sugar
  • 1 cinnamon stick
  • 4 whole cloves
  • 2 whole star anise
  • 2 bay leaves
  • 6 black peppercorns

You will also need..

  • Muslin or J cloth for your bouquet garni
  • Jars

Method

  1. Read through this recipe thoroughly before starting to ensure you understand each step before coming to it.
  2. Put the tomatoes, onions, garlic, chillies, ginger and red pepper in a deep saucepan. Season with salt.
  3. To make a bouquet garni, put the spices and bay leaves in the middle of a cloth and tie a knot or secure with an elastic band, add to the pan.
  4. Add the sugar and half the vinegar; bring to a simmer, stirring until the sugar has dissolved. Allow to simmer for an hour or until it’s thickened.
  5. Add the rest of the white wine vinegar and orange zest and simmer again for about half an hour.
  6. Meanwhile prepare your jars; wash in hot water and then place in the oven on a baking tray at 140C for 15 minutes. Leave in the oven on the lowest heat until you need them. Carefully remove.
  7. When the chutney has thickened, taste to check the seasoning.
  8. Carefully spoon the chutney in to your jars and secure with lids. Decorate with whatever ribbon and labels you fancy.