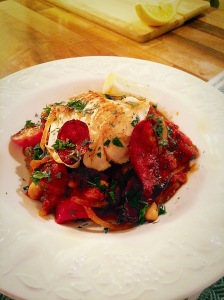
Baked homemade gnocchi with prosciutto, cavolo nero and mascarpone

I was 11 when I first went to Italy. Some family friends had invited me to go for the last 3 weeks of the summer holidays. At first, I was physically ill with the thought of leaving Mum and my family for that long. For the whole journey from Bath to London, as the other two kids sang along to Miss Dynamite, I sat in the middle with a feeling of dread and longing to be back with Mum.

Flying in to Rome, we drove up to Cortona in Tuscany and homesickness quickly switched to excitement and intrigue as we drove through the dusty, heat haze, up the poplar-lined track and towards the shuttered farm house that sat alone, surrounded by pine-laden hills. The aroma of pine and the sound of crickets still takes me right back to that holiday.

The next few weeks were filled by exploring the gardens and surrounding hills. We spent the days chasing and catching lizards, building rope swings and attempting to build a make-shift pool out of what I think was an old skip. We soon discovered that masking tape wasn’t going to hold the holes together and moved on to trying to find wild boar- thank goodness we didn’t succeed.

Italy was where I discovered tomatoes. Not the kind you get in England but big, sun-ripened bursting ones with deep red skins. Helping to prep them in the stone-floored, cool kitchen, you couldn’t ignore the aromas coming from them- they were like nothing I’d ever experienced. We’d eat them in the shade with buffalo mozzarella, hams, salamis, rocket and fresh bread- what more could you possibly want.

It’s also where I discovered gnocchi, in a small restaurant in Cortona. Bored of ordering spaghetti bolognese and margarita pizza (I was 11, don’t judge me), I was given a verbal slap on the hand and told to order something different. I loved it.

This recipe is a tribute to that holiday. I’ve used Unearthed prosciutto del Poggio as I feel their open mind to discovering new foods is on a par with how my 11 year old self felt during those three weeks of exploration and discovery. I’ve paired it with cavolo nero, a shallot, tomato, garlic and thyme sauce, mascarpone and homemade gnocchi.

gnocchi

Ingredients

  • 2 packs Unearthed Prosciotto– from Waitrose (I used 12 rashers and ate the rest)
  • 200g cavolo nero (use kale if you can’t find)
  • 12 tsp mascarpone
  • Parmesan to serve (optional)

For the gnocchi

  • 1kg floury potatoes
  • 175g ’00’ four (use plain if you can’t get)
  • 2 large egg yolks
  • generous pinch of salt

For the sauce

  • 2 large echalion (banana) shallots, finely sliced
  • 4 fresh plum tomatoes, diced
  • 2 large garlic cloves, chopped
  • 680g jar of passata (I used Cirio)
  • 3 sprigs of thyme
  • Splash of balsamic vinegar
  • 1 tsp tomato puree
  • Generous glug of olive oil

Method

  1. Preheat the oven to 160ºC. Rub the potatoes in olive oil and place on a parchment lined baking tray. Bake for 1.5 hours, or until soft- this will depend on their size. Turn them half way through to cook evenly. (If you’re impatient, put them in the microwave 2 or 3 at a time and cook in bursts until soft all the way through).
  2. While your potatoes are in the oven, make your sauce. Heat the oil to a medium heat and add the shallots and garlic. Fry, stirring for 5 minutes until soft.
  3. Add the chopped tomatoes and leaves from the thyme sprigs and cook until the tomatoes have broke down. Keep stirring to make sure they don’t catch and add a splash of water if it gets too dry.
  4. When it’s looking paste-like, add the balsamic vinegar and tomato puree, stir to incorporate then add the passata. Leave on a low simmer, stirring occasionally until needed late. Slow cooking tomatoes really brings out their flavours.
  5. When the potatoes are soft, leave to cool for a few minutes and then carefully remove the skins. If you’ve got sensitive hands and want to get on with things then don some clean washing up gloves- these will protect your hands from the heat.
  6. Put the potatoes 1 by one through a potato ricer or pass through a sieve in to a large mixing bowl. Add the egg yolks, sieved flour and salt. Bring together with a round-ended knife and then your hands to form a dough.
  7. Tip out on to a lightly floured surface and knead lightly. Roll in to a thick sausage shape and cut in to 4 pieces. Roll the first piece out in to a thinner sausage (about 1.5cm thick) and cut in to 2cm pieces. Pinch gently in the middle and place on a parchment-lined tray.gnocchi-3
  8. Turn on the grill to high and boil two pans of water- one for the gnocchi and one for the cavolo nero. Put the cavolo nero in the pan for no more than a minute, then drain, cool under cold water and set aside.
  9. Cook the gnocchi in two or three batches. It’s cooked when it floats to the surface. remove with a slotted spoon and add to the sauce. When it’s all cooked, stir the kale in to the gnocchi and sauce and tip in to a large baking dish. tear the ham in to roughly two pieces and push in to the gnocchi, keeping the top exposed. Dot with teaspoons of mascarpone.
  10. Place the dish under the grill, keeping a watchful eye. You want the ham to crisp up a little on top and for the mascarpone to brown slightly. When this is done, you’re good to go, serve with a salad and a good Italian red-divine.

Going on this trip proved that you often get the most out of doing things that you’re scared of and taught me a valuable lesson in using fear to keep exploring and keep discovering.


Rarebit with caramelised onions and homemade sea salt and thyme bread

Comfort food at its absolute best. January is already miserable enough without giving up a bunch of your favourite foods- so I say eat what makes you happy. There’s still months before its going to be warm enough to have any flesh on show, so why not just indulge a little longer…

You can make most of this recipe with ingredients from the store cupboard and fridge. Making your own bread is time consuming but actually very simple and it will fill your home with arguably the best aroma in the world. You could make it a few hours in advance, or the day before as it’s going to be toasted. If you can’t be bothered, then any nice loaf will do.

If you’re not making the bread, jump to step five then follow step 11 onwards.

Ingredients:

For the bread

  • 450g strong white flour
  • 7g sachet yeast
  • 290mls luke-warm milk (not hotter than blood temp as will destroy the yeast!)
  • Bunch of fresh thyme, leaves removed
  • 2 tsp sea salt
  • 1/2 tsp caster sugar
  • 2 medium eggs- 1 beaten for the bread mix and one for glazing.

For the caramelised onions

  • Knob of butter
  • 2 red onions, finely diced
  • 100ml balsamic vinegar
  • 1tbsp caster sugar
  • Pinch of salt

For the rarebit topping

  • 150g mature cheddar cheese, grated
  • 120ml milk
  • 25g plain flour
  • 1 tsp Worcestershire sauce
  • 1 tsp English mustard
  • 2 egg yolks
  • Seasoning to taste

Method

  1. Get all of your ingredients for the bread measured out and ready to go- it’ll make your life easier when you begin.
  2. Using a little of the warm milk, dissolve the sugar and yeast in a bowl; if it clumps together, gradually add more milk until smooth.
  3. Put the flour, thyme and salt in a large mixing bowl. Add the yeast mixture, the rest of the milk and the beaten egg. Using a round dinner knife, cut through the mixture, mixing it until it all starts to come together.
  4. Tip the mixture out on to a lightly floured surface and knead for 10 minutes or until smooth and elastic. Put the dough in a lightly oiled bowl, covered with lightly oiled cling film, in a warm place for 1 hour or doubled in size.
  5. Meanwhile, soften your diced onions in the butter until completely soft. Add the balsamic vinegar and sugar and reduce until sticky but with a little liquid around the onions. Set aside.
  6. When the dough has risen, tip out on to a lightly floured surface and knock-back (knead lightly for a minute to even out the air bubbles).
  7. Heat your oven to 200’C/180’C fan. Put a tray of water on the bottom of the oven- the steam generated will help your bread for a nice crust.
  8. Form the dough in to the shape you’d like- trying to maintain an even-ish height throughout. Place on a lightly floured baking tray and press gently to flatten the base. Using a sharp knife score in to the top- make whatever pattern you fancy.
  9. Cover the same way as previously and  entertain yourself for half an hour while it rises to 1 1/3 the size, then, glaze lightly with beaten egg.
  10. When ready, bake in the oven for 30 minutes or until a light golden brown. It should sound hollow if you knock on the base of the bread.145305494517638
  11. Now for the rarebit topping, it’s getting exciting now. Heat the milk gently with the cheese in a small saucepan. When smooth, tip in the flour, mustard and Worcestershire sauce and beat with a whisk, on the heat until the mixture starts to come away from the sides.
  12. Add the two egg yolks and beat until smooth. It should be a thick paste but spoonable.
  13. Turn your oven to the grill setting and turn up to 220’C.
  14. When the bread is cooked and cooled down, slice four 1.5cm slices. Toast either in a toaster or drizzled lightly with olive oil and in a griddle pan.
  15. Smother a thin layer of the onions on to the toasted bread, and then cover with a thick layer of cheese sauce. Place your toasts on a baking tray (the one used for your bread will do and save on washing). Place under the grill and keep an eye as they will turn quickly. When dark brown patches begin to appear they’re good to go.
  16. Serve with a salad or eat as they are for brunch, lunch or dinner.


Harissa Roast Chicken with a Butternut Squash, Red Onion and Pomegranate Bulgar Wheat Salad

If you look out the window you may be fooled in to thinking it’s October, I went out earlier in a fur hooded coat and tights! It’s July!!! On days like this it really is just more sensible to stay inside and thank your lucky stars that you decided to sell your Secret Garden Party ticket.

Although a traditional roast chicken with all the trimmings would probably be more appropriate, I wasn’t going to let the weather get the better of me and decided to cook up this Moroccan feast instead! Harissa is a Moroccan chilli paste that can be added to stews and tagines or simply as a marinade for chicken, fish or lamb. If you’ve got some time on your hands you can make it yourself (it’s much nicer) or otherwise I find Belazu to be the best.


Ingredients:

  • 1 whole chicken
  • 1 Jar of shop bought or home-made Harissa paste
  • 3 Lemons (1 cut in to thin slices, 1 chopped in half and 1 zested and juiced)
  • 2 Red onions, cut in half length ways and then in to segments
  • 1 Carrot, peeled and diced in to cm cubes
  • 1 Butternut Squash, peeled and diced in to cm cubes
  • 1 tspn cumin
  • 1 tspn ground coriander
  • 250g Bulgar Wheat
  • 1 Chicken stock pot
  • 1 bunch Fresh Mint, chopped
  • 1 Bunch of Fresh Coriander, chopped
  • 1 Pomegranate, seeds removed
  • Sea Salt and Freshly Ground Black Pepper

1. Preheat oven to 200’C (180’C if fan assisted)
2. Start by placing your thinly sliced lemons on the bottom of a larger baking tray and place the chicken on top. Doing this will help protect the meat and also add flavour to the juices that run off. Stick one lemon half up the rear of the chicken.
3. Make some diagonal slices through the skin and in to the breast meat using a sharp knife. This will help the flavour of the paste penetrate in to the meat. Now, rub the harissa paste all over the chicken and under the skin where possible. Place in the oven and leave for half an hour.
4. When the half hour is up, add the carrot, squash and onions, sprinkle over the spices and toss. Put back in the oven for another half hour.
5. During this half an hour you can get the rest prepared for the bulgar wheat; chop your herbs, zest your lemon and remove the pomegranate seeds. The easiest way to do this is to half it along the equator and firmly bash the back of a spoon on to the skin.. the seeds will fly out so make sure you have a big dish to catch them!
6. Remove the chicken from the baking tray when the half hour is up.. check to see if it’s cooked by cutting in to the thickets part of the thigh. Transfer your bird on to a large plate, wrap in tinfoil and cover with a tea towel to keep warm while it rests.
7. Give your vegetables a stir and pop back in the oven for 20 minutes. If there are a lot of juices, transfer to a jug or bowl, you can add them to the bulgar wheat later.
8. Put the bulgar wheat in a saucepan with plenty of cold water and cook on a medium to high heat for around 10 minutes or until the grains are tender. When the water starts to simmer you can add your stock pot. Carefully drain.
9. Remove the vegetables from the oven, add the bulgar wheat to the tray and stir, being careful not to make it too liquidy, add some of the reserved juices. Taste as you go.. Next add the lemon zest, lemon juice, herbs, half of the pomegranate seeds and seasoning. You can serve it in the baking tray, simply sprinkle the rest of the seeds and some torn coriander and mint on top and you’re good to go! By now your chicken will have rested so pop it on a big wooden board and carve at the table!


Don’t feel like you’ve got to stick to a traditional roast at the weekend, there are endless possibilities that are far less time consuming when it comes to roast chicken, so have some fun and get creative! If you have any questions about any of my recipes, please feel free to ask away and I’ll be happy to help!

Turkish Lamb Koftas with Quick Flat Breads and Tangy Cucumber and Mint Yoghurt

When it comes to flavour, its pretty hard to mess up when fresh coriander, chilli, lemon and ginger are in town. They are the most solid of friendship groups and welcome a host of other ingredients with open arms. I always make sure I’ve got a supply of each in my fridge, especially during the summer when these light, zingy flavours are most suited.

If you’re struggling about what to have for supper one night and fancy getting a bit creative without having to use any special equipment then have a go at this recipe. It’s so simple to make and tastes out of this world! You could even cut your work load by buying some wholegrain wraps, but I personally think making the flat breads is half the fun! These flat breads don’t use any yeast and don’t need time to prove.I always get a bit of a buzz when I pull off something new so give it a go and the rewards will be worth the extra effort.

Here is what you’ll need to feed 4 hungry people;

For the Kebabs
– 1 Pack of Kebab Skewers (can find in any supermarket)
– 500g Lamb Mince
– 1 Red Onion, finely diced
– 1 Bunch of Corriander, chopped
– 1 Lemon, zested
– 2 Red chillies, de-seeded and finely diced
– 2 teaspoons Cumin powder
– 1/3 Bunch of Mint, chopped
– A good sprinkling of Sea salt and Black Pepper

For the Flat Breads (taken from Hugh Fearnley-Whittingston)
– 500g Plain Flour
– 2 Teaspoons Sea Salt
– 2 Tablespoons Rape Seed Oil or Olive Oil
– 300mls Warm Water

For the Cucumber and Mint Yoghurt
– 500g Greek Style Yoghurt
– 1/2 Cucumber, very finely diced
– 2/3 Bunch mint (a handful), finely chopped
– Olive oil for drizzling

To serve
– 1 Baby gem lettuce
– Lemon Juice

Method;

1. First, preheat your oven to 180’C and soak your kebab sticks in some water. This will prevent them burning when you later cook the meat.
2. Start by making your flat breads. Sift the flour and salt in to a mixing bowl. Add the oil and water and bring together using your hands until it has formed a dough.
3. Lightly flour your work surface and turn the dough out. Kneed for a few minutes until its all come together and has an elastic consistency.Cover and rest until you’re ready to cook them.
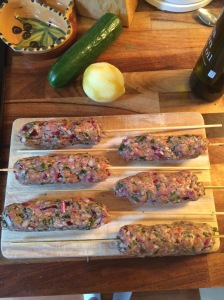
4. Next we move on to the Kofta mix. In a mixing bowl, combine all of the ingredients and mix until well combined. Remove your sticks from the water and lightly pat dry. Divide your mince mixture in to either 4 or 8 portions depending on the size you’d like and shape the meat around each skewer. Drizzle olive oil over your koftas.

IMG_5858

5. A griddle pan works best for koftas but a large frying pan will do. Heat your pan on a high heat and brown your koftas on each side in batches as you don’t want to crowd your pan. Place on a baking tray and set aside while you make your flat breads and yoghurt.
6. For the yoghurt, combine all of the ingredients and put in to a bowl. Drizzle over some olive oil and swirl around to slightly marble it.
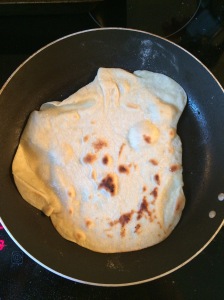
7. For the flat breads, roll your dough in to a sausage shape and divide in to 8 portions. On a floured surface, roll each portion in to a rough circle about 2-3mm thick. Heat a non-stick frying pan and one at a time, cook your flat breads for a minute or two or until they start to char in places then flip it over and cook for another 45 seconds. Put your breads on a plate under a clean tea towel. When you’re halfway through cooking your flat breads, put the koftas in the oven to finish off cooking.

IMG_5861

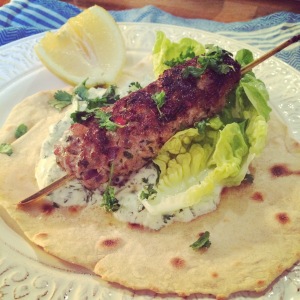
8. Serve by putting a flat bread on each plate. Dollop a generous amount of the yoghurt, followed by a couple of leaves of baby gem and finally your koftas with a squeeze of lemon juice and a sprinkling of fresh corriander. And there you have it! A Middle Eastern classic for dinner whenever you fancy it.

IMG_5868

Cod Loin on a Chorizo, Cannellini and Onion Stew

Whilst at university, I spent my summers working as a chef at what I think is one of the best places in the world; a small hotel called the Sea Club in the East of Mallorca in a little resort called Cala Ratjada. It is run by slightly eccentric and bohemian second generation owner Louis, his wife Jenny and their three sons. This little haven is now my second home and them and their children my second family. They run their hotel on traditional British values with a massive twist on the hazy and slightly lazy Spanish life style. I started running their kitchen when I was an inexperienced 19 year old but deciding to take the role on was one of the best decisions I’ve ever made to finding out what it is that I want to do with my life. Whilst there I made an effort to understand the Spanish way of eating and one of the dishes I occasionally put on the supper menu was Cod a la Plancha (massive outdoor hot plate) with a chorizo and cannellini bean stew.

Every night the guests would sit down together and we would serve a 3 course meal that would consist of tapas at the bar, a main and either pudding or cheeses. Cod is a fish that is pretty vulnerable to over fishing so be responsible and make sure you buy a sustainable source! The loin is the best part of the fillet because it’s the thickest but any part will suffice! Cooking this meal for 2 or 4 is really time efficient and if you get yourself prepared, its really pretty easy and ridiculously tasty!

IMG_5483

Ingredients (serves 2);

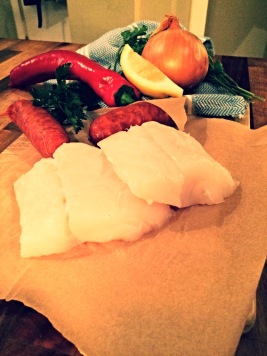
2 skinless and boneless cod fillets or loins
1 tin of chopped tomatoes
1 tin of cannellini beans (can also use butter beans)
2 chorizo uncooked sausages, diced.
1 chorizo uncooked sausage sliced thinly on the diagonal
1 red pepper, chopped in to small pieces
1/2 a punnet of baby plum or cherry tomatoes, cut in half
1 bunch of fresh parsley (stalks and leaves)
1 white onion, cut in half length ways and thinly sliced
1 lemon
2 cloves of garlic, finely diced

And here’s how to do it!

1. Heat a good glug of olive oil in a saucepan and add your onions, garlic, chopped parsley stalks and chorizo and gently fry for 5 minutes. Next add your red pepper and baby plum tomatoes.
2. When your onions are softened, add your chopped tomatoes, a squeeze of lemon and allow to simmer for 20 minutes. Taste your stew as you cook so you know what is needed along the way.
3. When your stew is pretty much good to go and you think it’s been seasoned nicely, reduce to a low heat and heat a pan for your thinly sliced chorizo.
4. simply add the slices to a hot pan and wait until they curl on each side before turning. This will only take about a minute all together. Remove the chorizo and put to one side, keeping the oils in the pan for frying the fish.
5. Now you’re ready to fry your fish. Heat the pan to a medium to high heat, season your loin or fillet with salt and fry for 3 minutes on one side without moving and then turn over, add a small knob of butter and fry for a further 2 minutes. The cod will flake apart easily when its cooked.
6. To serve, place a generous amount of the stew in a plate bowl and top with the fish then chopped parsley leaves, slices of chorizo and a lemon wedge.

IMG_5479

This recipe is really easy even if you’re not confident in cooking fish. The flavors all work really well together and its fun to present. If you’re having a dinner party its a great option because you can prepare the stew during the day and when your guests arrive all you need to do is fry your fish which will only take 5 minutes so you can relax and be sociable instead of slaving away in the kitchen! I’m all for giving guests great food but I think it’s most important to be able get the best of both worlds when entertaining! You could also serve this with some sauteed or new potatoes and some green beans or a salad would work well too!

Asparagus, Pancetta and Pecorino Spring Tart

I’ve got really in to making tarts recently. They’re a great way of using up any leftovers you may have in the fridge and make a perfect, delicious light lunch. If you don’t trust your pastry skills then there’s no harm in buying some ready made shortcrust pastry. I worked as a pastry chef for 6 months so I’ve had the skill drummed in to me repeatedly but I still don’t see any harm in cheating once in a while to decrease your work load!

I chose asparagus as its probably my favourite spring vegetable and works wonders with both pecorino and pancetta.

image

Here’s what you need:

-approx. 27cm flan ring

For the Pastry:
-110g cold unsalted butter
-250g plain flour
-5 tbspns ice cold water

For the filling:
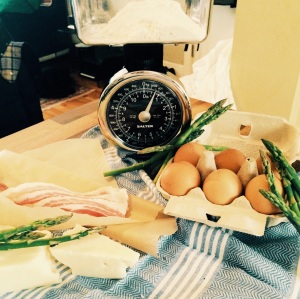
-12 Asparagus spears
-3 whole eggs
-3 egg yolks
-150mls creme fraice
-200mls double cream
-8 rashers of Pancetta
-100g pecorino
-freshly ground pepper
-1 bunch parsley
-Caramelised red onions (optional)

And here’s how to do it! If you’re using shop bought pastry you can skip to step 6.

1. Preheat your oven to 200’C
2.Start by making your pastry; put the flour in a large mixing bowl and dice the butter into small cubes (no more than 1cm)
3. Gently rub in the butter to the flour and lift as you do, this ensures the pastry isn’t too heavy. When the mix resembles bread crumbs and there are no lumps of butter left, gradually add the ice cold water, mixing with a knife until it starts to come together. At this point, go in with your hands and knead gently until it has formed a dough.
4. Form your pastry in to a rough sphere, wrap in cling film and rest it in the fridge for 15 minutes.
5. While your pastry is resting, cook your bacon in the oven on a baking tray until starting to crisp up.
6. Roll out your pastry to the thickness of a pound coin and make sure the diameter is around 35cm. To help keep it circular as you roll, keep rotating it in an anticlockwise motion.
7. When you’ve obtained the desired shape and size, carefully lift and place over your lightly buttered flan ring. Gently press in the edges of the pastry so that the crust forms a right angle to the base.
8. Now we need to blind bake it. To do this, cover your pastry with either parchment paper or cling film, tucking right in to the edges and fill with rice. I find rice works better than baking beads as it transfers the heat more evenly to the whole of the tart case.
9. Place your tart case on a baking tray and put in the oven for 15 minutes or until the sides are firm and the base is starting to firm. Next, remove the tray from the oven and carefully discard the baking parchment and rice. reduce the oven temperature to 180’C and pierce the base of the tart in several places with a fork. Place back in the oven for another 5-10 minutes until the pastry is cooked. This is essential otherwise your tart will have a soggy bottom which is best avoided!
10. While your pastry is still cooking, you can begin your filling. Beat together the eggs, egg yolks, cream, grated pecorino, creme fraiche and freshly ground pepper until well mixed. Roughly chop your parsley and stir this in.
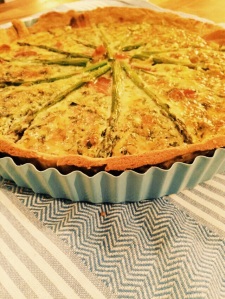
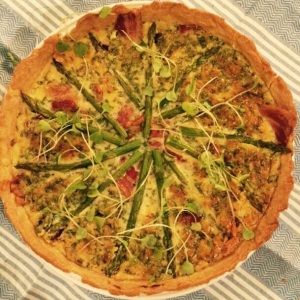
11. When the case is out the oven and the components for the filling are ready, spread a thin layer of caramelised red onions on the bottom of your case. You can either make these yourself or get it our of a jar. Or if you don’t fancy it then you can leave it out! next pour in your creamy filling making sure you don’t spill it over the edges. Carefully arrange the pancetta and trimmed asparagus spears pointing outwards, even spaces apart like numbers on a clock.
12. You’re ready to go! Cook in the oven at 180’C for half an hour or until golden brown and set.

image

This served up looks really impressive so have a go the next time you have friends over for a nice spring or summer lunch! I served mine with a rocket, watercress and roast tomato salad but get creative and add your own twist!

image

Pulled Pork and BBQ ketchup with Red Cabbage and Fennel Coleslaw

Pulled pork rose to fame in a flurry last year and is now a seasoned celeb on menus throughout the country and no wonder! It’s pretty difficult to resist the sweet, smokey tender meat and I don’t think coleslaw has ever been in a happier relationship! The great thing about it is that its actually very easy to cook, sadly the wait for it to be cooked is not so easy and my tummy is rumbling now just thinking about it in the oven! You don’t need to stick to a traditional coleslaw either and can easily pack a lot of flavour in to the accompaniment.

Here’s what you need to make approx 6 servings;

For the Pork and ketchup;
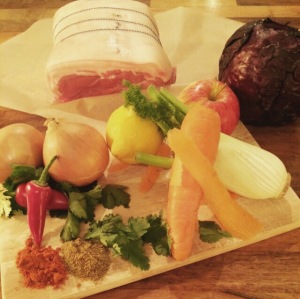
Approx. 1.5 kg Shoulder of Pork
3 tspns smoked Paprika
2 tspns ground cumin
3 tspns Sea Salt
3 Tbspns Olive Oil
2 apples (peel only)
2 carrots
1 large onion
5 cloves of garlic, crushed with the back of a knife
4 bay leaves
1 tbspn soft brown sugar
2 tspns tomato ketchup
1 tbspn balsamic or red wine vinegar
2 tspns Worcestershire sauce

For the Coleslaw;
1/2 Red Cabbage
2 Carrots
1 Bulb of fennel
1 lemon
2 tbspns mayonnaise
salt and freshly ground pepper
olive oil

To Garnish
1 Red Chili
1 Small Bunch of Fresh coriander

Processed with VSCOcam with m3 preset

Method;
1. Preheat the oven to 140’C

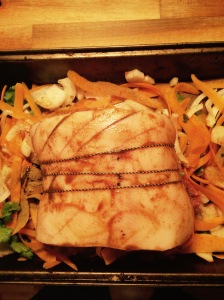
2. Start by peeling the 2 carrots down to the core and put the peel in the bottom of a roasting tray. Finely slice the onions and add those along with the apple peel, garlic cloves and bay leaves. This will form the base of your ketchup and will help to gently steam the pork in the oven with sweet flavours.

3. If your pork shoulder has not had its skin scored then you can do that now; slice a sharp knife diagonally through the skin and in to the fat. Now place the pork on top of the vegetables in the tray.

4. Make a paste out of the olive oil, paprika and sea salt and rub in to the pork skin, making sure its completely covered.

5. Now your pork is ready for the oven, place it in and roast for an hour.

FullSizeRender (10)

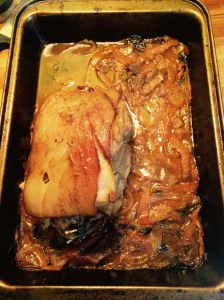
6. After the hour is up, take the roasting tray out and wrap it tightly in tin foil and place back in the oven. This step takes around 5 hours or until the meat is very soft and pulls away easily.

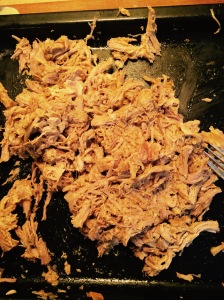
7. When your meat is soft,carefully lift it out of the tray and in to another. You can now discard the thick piece of skin and fat, it should pull away easily. Using two forks, pull at the meat until it has all come apart. Set aside and wrap in foil.

FullSizeRender (4)

8. The vegetables in the tray should now have all pretty much dissolved together. Remove the bay leaves and scrape the mixture in to a blender with the sugar,vinegar, Worcestershire sauce and tomato ketchup and blitz until smooth. Season to taste. Mix half of the ketchup with the pork and put the rest in to a dish for serving.

FullSizeRender (5)

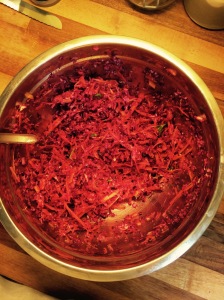
9. For the coleslaw; peel the carrots, finely grate and place in to a mixing bowl. Remove the stalks (keep the finer, herb like bits at the top, these can be added too!) and base of the fennel, chop in half and remove the core at the bottom. place in a blender with the cabbage and blitz. If you don’t want such a fine coleslaw you can finely chop instead. Add the fennel and cabbage to the carrots

10. Zest and juice a lemon and add this to the vegetables. Add a glug of olive oil, salt, pepper and mayonnaise and mix.

FullSizeRender (6)

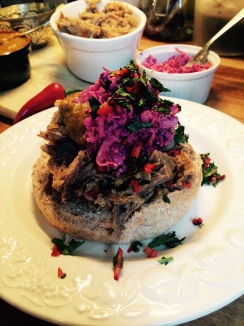
11. To serve, lightly toast your buns. Stack the pork, ketchup and coleslaw and garnish with some chopped coriander and chili for extra freshness! Serve with a salad or fries or both!

IMG_5098

Although the whole process takes a long time, as soon as the pork is out of the oven it’s really pretty quick! Its a definite crowd pleaser so next time you’re cooking for some friends or family at the weekend, give it a go, it’s worth the wait!